"Do You Really Want An
Epoxy Garage Floor?"
The epoxy garage floor finish seems to be in vogue these days for residential use but there are a number of drawbacks to it that have caused garage floor finish failures leaving unhappy customers fuming mad.
I don't want that to be YOU so let me explain what the root cause of these failures are and if your floor is a good candidate for this type of finish.

In most cases, the floor is without a vapor barrier directly beneath it to prevent moisture vapors from traveling up from the sub-soils to the underside of the concrete slab and working their way to the surface of the floor. What happens here is that the moisture then breaks the bond between the floor surface and the primer paint or base color paint of the floor, if primer is not used. Flaking, chipping and spalling of the new finish occurs leaving a spot where no finish is apparent and the old floor finish shows through.
Professor Emeritus says: " A Mans Word Is His Bond That Binds Him To All He Agrees To" and the same can be said about garage floor epoxy. If the condition of the concrete garage floor becomes moist after the application of the finish due to the lack of a proper vapor barrier, then the finish will not bind to the floor causing a finish failure of major proportions.
In other words, the finish doesn't agree with the floor.

The second problem relates to major temperature swings because your garage is not uniformly heated. What happens here is that expansion and contraction of the garage flooring causes stress cracks in the finish due to the fact that the coefficient of expansion for the finish varies greatly from that of the concrete floor it is trying to bond with. The cracks, while open, allow humidity and dirt to enter in and work their way between the garage floor surface and finish breaking down the bond along the crack. Then, you will notice chipping and spalling along the crack in various places as this cycle repeats itself annually. This problem mostly occurs in geographic locations that experience 60-100 degree farenheit temperature changes over the course of each year.
The third problem called "hot tire syndrome" has caused a number of epoxy garage floor finish failures. What happens here is that you pull your vehicle into your garage after a bit of a journey to the Pub or Donut Shop and the tires have built up road heat which travels down through the finish and degrades the bond just a bit (at first). After about two months of this repeated activity with the car parked in generally the same spot, the bond is broken and the new finish then binds to your hot tires and is tracked out the door and down the street.
(Note: Some epoxy garage floor finish manufacturers are working hard to address this problem with "additives" that resist tire heat. I suspect they will be successful because there is a big demand for these finishes in the residential setting. So check with the manufacturer of the product you are considering BEFORE YOU BUY to see if they warrant the product for tire heat problems).
The three root causes listed above are the major reasons for epoxy garage floor finish failures reported to date. Below is a quick checklist of items that you can glance through to see if any apply to your situation. If any do, then your floor is not a good candidate for this type of finish and you can expect a finish failure at some point long before the serviceable life of the finish would normally expire.
Checklist:
● Geographic location and no uniform heat source.
● Floor has no vapor barrier directly beneath it
(see below for instructions on
how to DIY test for this).
● Floor has existing cracks with differential (vertical)
settlement on either side of the crack.
● Floor has existing cracks that have spread
(horizontally) apart.

Here is how you check the moisture situation below your floor. Take two heavy weight garbage bags and cut a 2' x 2' square out of each side of the bag. If you have a standard double garage you will need four of these test squares.
Next, broom clean the area of the floor where you will place your test squares and tape the squares to the floor at the locations shown on the Garage Moisture Test Plan at the left, using clear tape used for sealing up shipping boxes. Leave the test squares in place for twenty-four (24) hours.
Next, remove the test squares from the garage floor and check for visible moisture or a darkening of the floor surface below where the test squares were placed. If either condition exists (visible moisture or darkening of the floor surface) then your floor has a moisture problem and is not a good candidate for epoxy garage floor finishes of any type or composition.
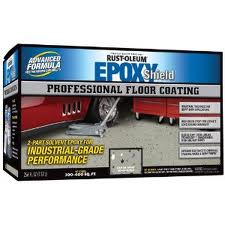
If your garage floor is a good candidate for a epoxy garage floor finish and you decide to move forward with the application there is an excellent short Video below by Rustoleum that shows how the installation is accomplished and I suggest you watch it before deciding whether to hire the process done by professionals, or doing-it-yourself.
If you do decide to do it yourself there are some excellent products available at the Big Box Home Stores and some come with DVD instructional videos, or visit with your local paint supplier. Go in and talk with the sales reps about what they know concerning the products they sell, the product warranties, and the possible pitfalls of doing-it-yourself.
Learn everything you can before you spend your valuable time and money.
Next, for a detailed step-by-step process of the eoxy garage floor preparation, visit our pages:Garage Floor Preparation, Garage Floor Repair, Garage Floor Etching, Applying Epoxy Finish, Curing Epoxy Finish.
Do You Have An Epoxy Garage Floor
Success Story,
Or Is It A Horror Story?
If you have experience with an epoxy garage floor system, share it with our readers.
There seem to be as many success stories as there are horror stories, and we want to hear about all of them.
Tell us what products you used and upload your photos or graphics to show the results.


❖ Testimonials ❖
We have been following your blog and we have found a lot of useful information in it.
Cecil Sibanda
Product Coordinator
Dorman Products, Inc.
Colmar, PA
I was pleased that I was able to easily find the proper tall storage cabinet for my garage. I needed lockable storage to keep my toddler away from sharp tools and solvents that my husband stores. Garagetips-101 solved my problem!
Renee M.
I love the detail in your garage building pages. They helped me understand how to engineer a foundation for a garage we are planning that our building department will approve. I had the inspector go to your pages and review what I was talking about. Now, I am studying the wall framing sections, as we plan to build it ourselves this fall. Thank you so much for the great information.
R.G.,
Des Moines, IA
Great stuff on wall framing. I never really understood the on-and-off spacing concepts for the wall studs until I read your explanations.
Will,
Grand Island, NE